This engine rebuild procedure is documented from a recently performed overhaul of an MC21R. Photo's were used to record as many steps as possible to help demonstrate procedures, techniques, and common practices when working on the various components. Due to the large number of illustrations and photgraphs (and consequently the extended download time to view each page), the procedure is split into 5 sections.
Most images have component "maps" whereby the mouse pointer can be hovered over a particular area to show a description of the part and/or hints or tips relevent to the current step in the overhaul procedure.
![]() constantly strives to provide consistant, accurate data, and welcomes feedback (good and bad) to any content on this website. If you feel you can contribute to this or any page on the website, or simply want to let us know if you have found the website useful, please contact us.
constantly strives to provide consistant, accurate data, and welcomes feedback (good and bad) to any content on this website. If you feel you can contribute to this or any page on the website, or simply want to let us know if you have found the website useful, please contact us.
Ed.
Engine Rebuild: 1 Strip-down and Inspection.
As with any other procedure described on this website, preparation is key to success. The top end is a straightforward job, easily performed with the engine en-situ, but for sheer convenience and access it is advisable to remove it for crankshaft replacement.
Before the engine is removed, drain the transmission oil, preferably while it is still hot. Understandably this will not necessarily be possible if you are repairing a seized barrel, but this particular subject motor had a failing crank, and although noisy, still started and ran! Regardless of the repair work to be undertaken, for the minimal cost of a litre of transmission oil, it's a good opportunity for replacement!
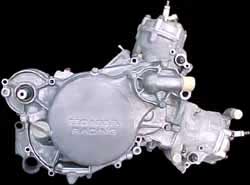
| Our No.1 rule is cleanliness! Give the motor a good once over to remove the worst of the oil and grime while it is in the frame. |
To ease engine extraction, the carbs and oil pump should already have been removed, disconnect the coolant distributor from the front of the water pump housing and any remaining hoses. Now remove the carburettor inlet manifold and reed blocks. You should now have a motor with only the major components in place, i.e. crankcases, barrels, cylinder heads, clutch and water pump covers.
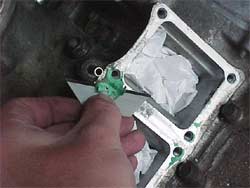
Plug the various ports and passageways with clean cloth or paper towel, and with a dedicated gasket scraper or a new clean Stanley blade, very carefully remove any excess gasket paper remaining on the mating surfaces.
| Note: | It's imperative that only a new blade is used for this operation, and that the blade is kept at as shallow an angle to the surfaces as possible to prevent scoring them. |
Once all the surfaces are clean, degrease them by wiping them with a cloth dampened with a little carb cleaner or white spirit, and blank them off with masking or duct (Duck) tape.
![]()
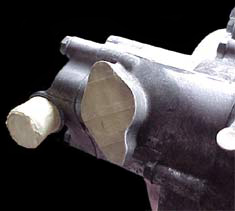
Do this with all entry and exit points and then the motor will be ready for a damn good clean! A good proprietary degreaser such as Jizer or Gunk can be used, but thanks to our friends at TYGA Performance, a better, more cost effective solution is at hand, known as " Soup"!!
Measure equal quantities of diesel and water into a suitable container, and add a generous helping of manual washing powder to the mix until it's of the consistency its name would suggest!! Don't use an ecologically correct expensive powder safe enough to sprinkle on your Cornflakes, but use the nastiest, cheapest washing powder available... preferably something with the word BLEACH in the ingredients somewhere!!!
The diesel acts as a solvent, while lime and oxidants in the washing powder act as a caustic agent, getting right down into the surface of the alloy.
Now, the nature of this last statement alone should be enough for you to realise that you don't need to leave the solution in contact with the casings for very long! The solution isn't too good for rubber seals either if left exposed for extended periods, but is safe enough to splash around virtually all over the bike anywhere you'd use a commercial cleaner/degreaser.
| Although "Soup" consists of common every-day ingredients, care must be taken in the disposal of the waste solution as not only is the diesel harmful, but the oils and dirt suspended in the used liquid make it extremely hazardous, so don't just go pouring it down the drain! |
| Note: | Always use of rubber gloves when handling any solvent, be it commercial or "Soup"! |
Brush the Soup on liberally, working it into all the crevices and corners and allow it to stand for 15-20 minutes. The use of both an old toothbrush and/or a Scotchbrite![]() pad to agitate the mixture will help bring the alloy up to an impressive finish. Simply rinse the casings off with fresh cold water, and repeat the operation on any further persistent deposits.
pad to agitate the mixture will help bring the alloy up to an impressive finish. Simply rinse the casings off with fresh cold water, and repeat the operation on any further persistent deposits.
With the casings cleaned, dry of any excess water with a suitable cloth, and closely inspect all the exterior surfaces for any signs of damage. If all looks well, the motor is ready for disassembly.